Design Diary: How to paint your own room
Use these tips and tricks to spruce up your living space easily


When it comes to revamping one’s interiors, nothing is quite as easy — or inexpensive — as a new coat of paint. And best of all, you can do it all on your own.
What could do wrong when you don your painting aprons? Nothing that you can’t fix, but follow these easy steps to make sure all the effort was worth it. Because nothing pains like having an ‘expert’ save your DIY project.
Before taking roller to paint, consider what you would like to paint — the full room, an accent wall, the ceiling or even bands that offer great optical illusions to mask any size or height issues. Most importantly what colour are you after? Remember that lighting plays an important role in how colours are perceived in a space: once you have selected shades that you like from a fan deck or the sample libraries most colour vendors have, ask for a sample pot of your top 3 shades and buy a small brush.
Paint blobs of all 3 colours side by side on these key locations — the wall with the window, the wall next to the window and the wall farthest from the window. Reviewing these shades as the sun travels through the day will give you a very good idea of how these colours would impact the overall room. Some paint companies allow customers to upload a photo of their space and preview different colours on the walls. But colours can look different in real-world conditions, so you’ll still need to try it out in the space.
To determine how much paint you might need, measure each wall end to end (including the openings) and the tallest point. Share the overall information with the paint vendor, request a 10% extra and inquire how much water will be required to thin the paint (if required). When going dark to light you will need a few coats of base white/grey tinted primer and then the actual shade. On the other end of the spectrum, darker colours require more coats of paint itself.
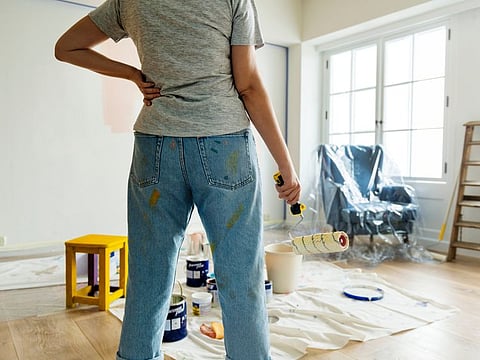
To prepare your room, push all furniture in one corner and if it’s a small space, to the centre. Cover everything — furniture, accessories, even the floor — in lightweight plastic sheeting and take off the curtains.
Apply putty over cracks, holes etc and wait to dry. Sandpaper the walls to even out the textures and apply the painter’s tape to the edges of the room’s corners, door and window casings, power outlets and switches. Make sure you seal the tape properly to avoid mishaps later.
Mix your paint (whilst still in its container) with a wooden spoon, gently tipping it into the paint tray. Dip the roller into it and apply to the main areas of the wall in up-down movement, leaving the edges to be finished with a thin brush. Allow to dry before applying the second coat. Once the desired results are achieved and the paint is dry, gently remove the tape.
YOU WILL NEED:
• Paint
• Paint roller and extension pole
• Paint tray
• Paintbrushes
• Sandpaper
• Painter’s tape
• Drop cloths or lightweight plastic
• Rags
• Putty and putty knife

