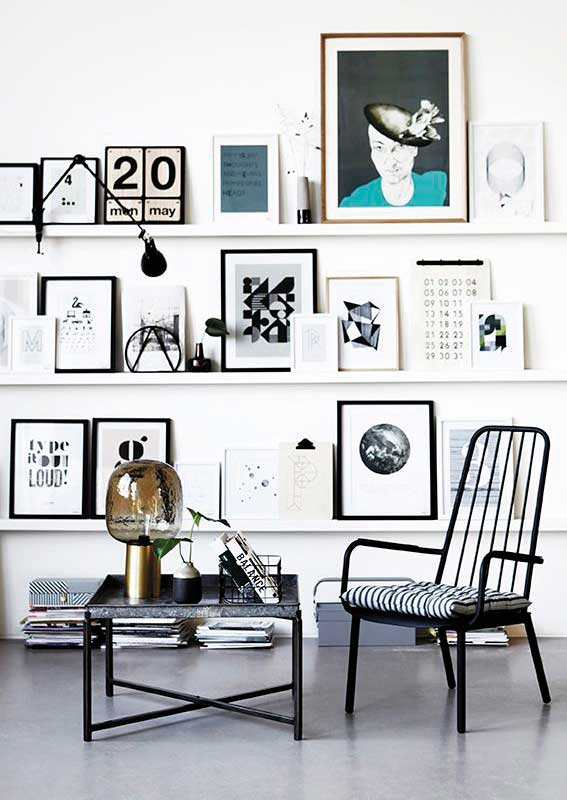
When it comes to home decor, nothing fills me with greater interior envy than a beautifully appointed picture wall.
When I had my gallery wall put up, I had drafted each nail and each frame in AutoCAD and given the handyman a printout with exacting dimensions. He still messed it up (we saved it eventually, once he conceded he was better off following my drawing), but there are ways you can achieve your feature wall with a lot less fuss.
THE GALLERY WALL IN 5 STEPS
1. Establish your style. Would you, like me, prefer to have the same frame (personally, I find rectangular frames better as you can use them on both axis for variation), or would you like to style different sizes and materials? Would you like a definite border that defines the overall installation or would you prefer a more organic scheme? Once you have decided on that, I recommend you cut out the frame sizes in craft paper.
2. Rather than scarring your wall with random nail pricks, lay out the cutouts on the floor, playing with them until you achieve a composition you are happy with. Take a picture of your set up. You can avoid the entire cutting and assembly step if you are good with graph paper or software that can help.
3. When creating a composition I recommend you establish a baseline and a crown. The base line should ideally be a few inches above the accent furniture by the wall. The crown is typically the height of the pelmet or window. Given the region’s love for floor to ceiling glazing, best you work with proportion. Leaving the same space at the bottom and top is a safe bet, else try to limit things to the eight-foot mark.
4. Once the composition is determined, using a measure tape establish how far down the hanging hardware is on the back of your frames. Mark those on the cut-outs. Using painter’s tape, stick your composition on the wall. The really fastidious would replicate the scheme with exact distances between frames as established via the dummy layout; for the rest of us, the reference picture is guide enough. Now you will know where to hammer the mail. If your frames have a hanging wire at the back, establish its most stretched point and measure that from the top of the frame to get your nail point.
5. The optional bit here is the base colour. You might want to highlight your gallery wall further with a contrast wall colour. In my opinion, a light grey or deep blue always works. You can always avoid this and continue to hang the frames. Start from the lower section of the wall, proceeding to the top.
THE EASIER WAY OUT
The picture ledge is a smart alternative to the gallery wall. You can get a picture ledge from Ikea (basic white, black and light wood), or invest in a marble and brass shelf from The Bowery Company for something more luxurious. Once installed, place your frames on the ledge, and layer them over each other’s edges for a loft feel. For greater impact, intersperse the frames with small artefacts, light-weight houseplants and books.
PERSONAL IMPACT
Pictures of family and travel memories are de rigueur; try these websites for ultra cool, super personal artwork — delivered to your doorstep.
Mapify can help you create personalised map posters. These ultra-detailed illustrations can be customised to depict the exact coordinates for the location of your choice. You will have options of size and style.
The Night Sky has a fool-proof interface that will recreate the starry night that blessed your special occasion. Create your own star map by simply entering the location, date and time. You can choose between constellations, a grid or just the stars in the sky. Select one of the four colour schemes. The time and place signature comes with the option for a personalised message!


