
Step-by-step guide to making and wrapping vegetable Thai spring rolls
Dubai-based Thai chef teaches you the art of wrapping the fillings in rice paper
Everyone’s favourite Asian finger food – the spring roll – holds pride of place on appetizer platters and are often the entrée we instinctively plump for at every Asian restaurant. And who can blame us? The delight of biting into crunchy, golden pastry dough parcels that break open to release vegetables and/or meat stir-fried in soy sauce and other sweet-and-sour condiments is an eating ritual that is be savoured and repeated as often as possible.
Originally from China, where it is eaten during the Spring Festival (hence the name), the use of fresh vegetables and their compact cylindrical shape secured spring rolls their widespread popularity throughout the Southeast Asian region. Resulting in every country, from Indonesia to Philippines, to Vietnam and Thailand, having their own iteration. Some use wheat flour wrappers and others use rice, the fillings vary, as do the sauces they’re paired with but every version involves deftly wrapping the filling in a sheet of pastry. It’s the step that trips up novice cooks and pushes them to reach for the takeout menu.
Chef Wichit Panyo, Chef de Cuisine at Benjarong, Dusit Thani Dubai’s signature Thai restaurant, has a simple 7-step method that makes folding the pastry sheet a breeze.
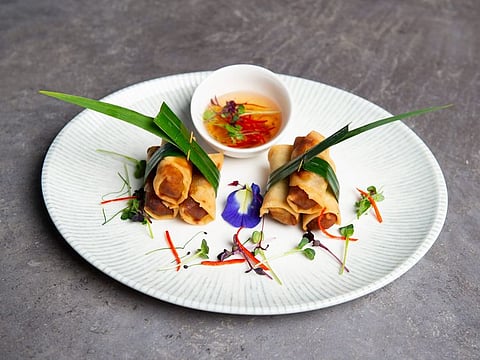
His Vegetable Thai Spring Roll recipe also includes a crunchy filling made with crisp, stir-fried vegetables and glass noodles for an extra bite.
Another element that sets apart these Thai spring rolls from their Chinese counterparts is that they aren’t cooked in sesame oil.
Ingredients
100gm glass noodles soaked and cut into 2 cm
30gm carrot, grated
50gm sliced black fungus (cloud ear fungus)
100gm sliced white cabbage
¼ cup spring onion
1 tbsp garlic chopped
2 tbsp soy sauce
3 tbsp oyster sauce
1 tsp sugar
2 tbsp vegetable oil for the filling
4 cups oil, for deep frying
5-6 spring roll pastry or rice paper wrapper
Water for sealing the rolls
Method
Making the vegetable and glass noodle filling
1. Chop the ingredients as finely as possible. This helps ensure the vegetables cook evenly and quickly when stir-frying.
2. Thinly slice the carrots. Then julienne them into thin, even strips
3. Slice the cabbage into thin julienned strips.
4. Cut up the spring onion scallions diagonally, this increases surface area and releases more flavour while cooking.
5. Sauté the chopped garlic in oil and as it starts browning, add the sliced cabbage.
6. Then add the julienned carrots and once it has softened slightly, add the sliced black fungus.
7. Stir well, keeping the pan on high heat.
8. Once the vegetables start turning translucent and softening ever so slightly, add the glass noodles to the pan and stir well.
9. Then add the soy sauce, oyster sauce and sugar and toss well.
10. Then sprinkle it with the chopped scallions. Only do this right at the end as spring onions cook quickly on high heat and you can run the risk of overcooking them. Once the onions have been stirred in, remove the filling from the heat and keep aside to cool.
Wrapping the spring roll
1. Spread out your spring roll wrapper on a flat surface
2. Spoon 2 tbsp of filling on one end of the wrapper in a log shape but leaving enough space between the filling and the edges of the wrapper so the filling won’t spill out.
3. Start rolling the wrapper from the end with filling. Tuck it around the filling tightly and keep rolling away from you until you reach midway through.
4. Then, stop and fold the sides over so that they touch each other.
5. Continue rolling to the end of the wrapper.
6. The folded sides will now have created a second layer of the wrap, effectively double-wrapping and preventing the wrapper from getting soggy and breaking open while frying.
7. Once you’re reaching the end of the wrapper, brush the edge with rice flour paste and then seal it. The rice flour paste glues the ends to the roll and prevents the roll from unravelling while frying.
Frying the spring rolls
Heat oil in a wok or deep-bottomed saucepan and deep-fry the spring rolls until they turn golden brown.
Remove them from the pan and place on a paper towel or napkin to drain off excess oil
Serve with Thai plum sauce.


