Perseids 2026 in the UAE: How to actually catch a meteor on an iPhone or Android phone
The right settings, a tripod and dark skies can help you photograph the meteor showers
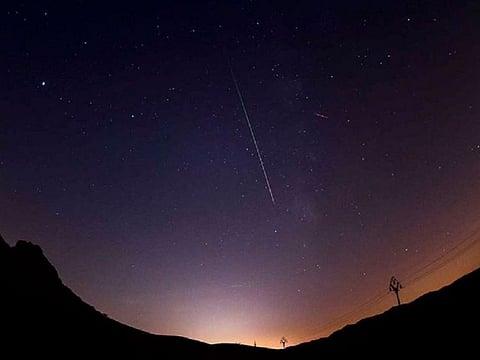
Dubai: The Perseids peak over the UAE on the night of 12 to 13 August, with up to 100 meteors an hour, and this year the peak falls on a new moon. No moonlight means the fainter streaks survive, which makes 2026 the best Perseid year since 2018.
So the sky is on your side. Your phone is not, though the reason is fixable once you know what it is.
Get updated faster and for FREE: Download the Gulf News app now - simply click here.
Every modern phone handles darkness by taking a burst of short frames and merging them into one clean image. That is brilliant for a moonlit dune and terrible for a meteor, because a meteor exists in maybe one frame out of thirty.
The fix is to stop the phone doing that. Everything below follows from it.
First, the tripod
This is not negotiable. A meteor photo is a long exposure, and a long exposure from a handheld phone is a smear.
Any cheap tripod with a phone clamp works. On iPhone there is a second reason to bother: Apple only unlocks its longest exposures once the phone detects it is completely still. No tripod, no long exposure.
If you have an iPhone
The stock camera can do this, with a caveat. iOS 26 added Night Mode Max, which lifts the ceiling from 10 seconds to 30. Open the camera somewhere genuinely dark, tap the arrow above the viewfinder, tap Night Mode, and pick the longest number offered. The long options only appear when it is dark enough and the phone is steady.
Now the catch. A 30-second night mode shot is not one long exposure. It is three 10-second exposures blended together, so a meteor caught in one of the three may survive or may be averaged away. It is a coin toss.
For better odds, use a third-party app that gives you a true single exposure. NightCap Camera (paid) is the usual pick because it has modes built for stars and meteors. Halide (free) and Slow Shutter Cam (paid) also give you manual control.
Base iPhones have no ProRAW and no manual focus in the stock app. Not fatal here, since you want the wide lens and infinity focus anyway, but it is why the apps are worth the few dirhams.
If you have an Android
Pixel is the most automatic. Switch to Night Sight, check Astrophotography is set to Auto in settings, and put the phone on a tripod. The shutter icon changes from a moon to stars when the mode engages.
Samsung hides its version in the Expert RAW app. Open the settings cog, turn on Special photo options, then tap the constellation icon top right.
Both are built to stack frames over several minutes to draw out faint star detail. They are gorgeous for a Milky Way shot and the wrong tool for a meteor. Use them once for your landscape frame, then switch to Pro mode for the actual hunting.
Most other Android brands have a Pro or Manual mode. If you can set a 20-second shutter and lock focus, you have what you need.
The settings
Shutter: 15 to 25 seconds. Any longer and the stars start trailing.
ISO: start at 1600. Up to 3200 if it looks too dark, down to 800 if it looks grainy.
Focus: manual, infinity. Autofocus will hunt forever in the dark.
White balance: 3900 to 4200K stops the sky turning swimming-pool blue.
Release: two-second timer or a Bluetooth remote, never a finger on the screen.
here's how to change these settings on your phone:
Android, step by step
Using Samsung as the example, since it is the most common here. Xiaomi, OnePlus, Oppo and Honor all follow roughly the same path under names like Pro or Expert mode.
Open the default Camera app.
Swipe along the mode strip at the bottom until you find Pro. On some Samsungs it sits under More.
Tap RAW or the RAW/JPEG toggle at the top and choose RAW plus JPEG.
Tap ISO and drag the slider to 1600.
Tap Speed or the shutter icon and drag to 20 seconds. Some models label it 20" or 1/20, so check the number climbs into whole seconds rather than fractions.
Tap the focus icon, usually MF or a flower symbol, and drag the slider all the way to the mountain or infinity symbol.
Tap WB and set it to around 4000K.
Set the self-timer to two seconds so your finger tap does not shake the frame.
Shoot one test frame. Too dark, raise ISO to 3200. Too bright or washed out, drop to 800.
Pixel is the exception. The stock Pixel camera does not give you a full manual shutter, so on a Pixel you either use the built-in Astrophotography mode or install something like Camera FV-5 to get real manual control.
iPhone, step by step
Apple caps a single exposure at somewhere between one third of a second and one second depending on the model, and that limit is set at hardware and API level. Every long-exposure iPhone app works by capturing frames continuously and combining them.
That sounds like bad news but it is not, because how they combine matters enormously:
Apple's Night mode averages frames, which is what erases a meteor.
Apps like NightCap and Slow Shutter Cam offer additive or light-trail stacking, which keeps anything bright that passes through the frame.
Additive stacking is the mode you want. Using Slow Shutter Cam:
Open the app and tap the shutter icon to open the mode list.
Choose Light Trail, not Motion Blur and not Low Light. Light Trail is the additive one.
Set the shutter duration to 20 or 30 seconds.
Tap and hold on the sky in the preview to lock focus and exposure, then drag the focus slider to infinity.
Set light sensitivity roughly two thirds up the scale, then adjust after a test frame.
Save as TIFF or HEIF rather than JPEG if the option is there.
Use a two-second timer, or trigger it from your Apple Watch if you have one.
NightCap works the same way. Pick Long Exposure or Stars mode rather than the automatic one, keep ISO high, and let it run.
The bit that catches people out here
August makes this harder than it looks. Overnight temperatures inland sit around 35C, and a phone shooting continuously for an hour will throttle and eventually refuse. Take the case off, drop the screen brightness, and rest it between bursts.
Condensation is the other one. Come out of an air-conditioned car and your lens fogs immediately. Give the phone ten minutes to acclimatise before you start.
Bring a power bank, and bring a red torch or switch to a red screen filter. Your eyes need about half an hour to fully adapt, and one flash of white light undoes all of it.
Two hours of shooting might get you two or three meteors, and one will be a faint scratch you only find when you zoom in at home. That is normal, and it happens to people with proper cameras too.
The trick is to stop chasing streaks. Compose something worth looking at, a dune ridge, a ghaf tree, someone gazing up, and let the camera run while the meteors wander into frame on their own.
Then put the phone down for a while and just watch.
When and where
Dubai Astronomy Group puts the local peak at around 1.30am on Thursday 13 August. Rates start climbing from about 11pm and run until dawn, with the best hours between midnight and 4am.
The night of 13 to 14 August is worth knowing about too. The true maximum falls in daylight here, which means the second night sits just after it and is every bit as good. If the first is hazy, you get another go.
You need distance from city light. Four spots people use:
Al Quaa Milky Way spot: around two hours from Dubai, 4x4 and desert driving experience required
Al Qudra desert: about an hour from Dubai, the easy option
Jebel Jais, Ras Al Khaimah: altitude puts you above some of the coastal moisture
Mleiha, Sharjah: the Al Faya site is a long-standing stargazing favourite
Dubai Astronomy Group event: Al Khatim Desert, Abu Dhabi, 12 August, 11pm to 3am, tickets from around Dh150


